A home’s exterior is the first thing guests will encounter as they walk into your house. No homeowner wants their home’s first impression to be bad or be the landmark the public uses to identify a location due to its bad or dirty image.
To prevent such possibilities, most homeowners are often at the forefront of revamping their home’s exterior. One way they do this is by painting. Painting is an activity you can undertake as a do-it-yourself (DIY) project or hire a professional to assist you.
Suppose you want to paint your home’s exterior independently. Do you know how to execute the project? If your skills have some grey areas or you have no idea how to paint your home’s exterior; here’s a DIY guide for the process:
Prepare Beforehand
Failing to plan is planning to fail; you don’t want to fall victim to this as you execute your project. You want to get the right exterior paint and tools for the job before starting. Imagine starting to paint without all the tools, and you must stop painting to rush and get an item. What will be the final look of your painting job? Your guess is right; the work will likely be shoddy.
Therefore, the first step in your DIY project is gathering all the necessary tools. These go beyond the painting tools; you’ll need accessories to assist you in executing the job. Some tools you’ll need are a spray painter, paintbrush, exterior paint, primer, ladder, sandpaper, caulk, scraper, roller, plastic sheeting, water, and a pair of overalls. If you don’t have some of these tools at home, visit your local hardware and stock up. Find more at Ring’s End website or another site at your disposal.
As preparation, you want to pick the perfect weather for the job. Ensure it isn’t too sunny or rainy. Weather forecasts should help you determine the perfect day; it’s best to work on a cloudy day to prevent too much work fatigue.
Clean The Surface
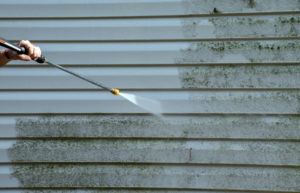
Over the years, your home’s exterior will likely have collected a considerable amount of dirt, dust, and stains. You need to eliminate these for proper bonding between the paint and the surface. How do you do this?
Start by scrapping off any bumps or debris stuck on the walls using the scraper. If there’s any mold, eliminate it but be weary of touching it with your bare hands. Suppose the mold covers a large surface of your home’s exterior. It’s best to hire mold experts to deal with it before you proceed.
Next, you need to clean the surface; the pressure washer will come in handy at this point. It’ll do a faster and cleaner job than using a rug. Ensure you know how to utilize the equipment to avoid accidents and damage, like broken windows. Alternatively, use your garden hose for the job; minimize the pipe’s diameter with your finger to ensure enough pressure to remove dirt, even in high areas.
Prepare The Surface
Once your surface is clean, you should prepare it for painting. Start by sanding the surface to smoothen it for proper bonding to avoid paint-related issues. Due to the large surface area of your exterior, consider asking for help with this step to save time.
You want to check your exterior for damage and cracks. If you find any, fill them up using caulk and level the surface so there’s no swelling. The aim is to maintain a flat surface for your painting work to be seamless.
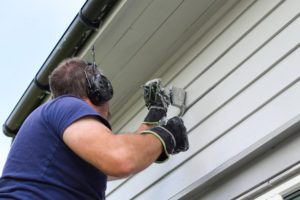
Next, please cover the edges of your windows and doors with plastic sheeting to prevent them from getting paint as you first work on your walls. Ensure you secure the sheeting with tape.
Paint The Walls
With the surface clean and prepared, it’s time to paint your home’s exterior, starting with the walls. You want to start by applying the primer on the surface using the spray painter. The primer will fill any pores on your walls, preparing a smooth surface for you to paint.
It’s best to paint from top to bottom to maintain a clean job by avoiding paint drips on the done surface below. As you do this, you’ll need the ladder for easy access; ensure you anchor it properly to avoid falls.
After the primer, proceed to apply two coats of your exterior paint. It’d help to alternate between the spray painter and paintbrush as you apply the coats. Preferably, do the first coat with a brush and the final coat with the spray painter. Doing so will eliminate brush strokes on your final surface. Plus, it’s advisable to follow the final coat application with a paint roller to ensure the paint sets in and bonds well with its predecessor.
When painting, allow drying time in between the application and take steps to minimize undesirable smells.
Paint The Other Parts
After painting your walls, it’s time to handle your other exterior; doors, windows, and siding.
Start by peeling off the plastic sheeting you placed on them to expose all their parts. Here, it’s best to use a paintbrush; it’ll get all the joints adequately and won’t interfere with your wall paint.
As you placed the sheeting, there’s a likelihood you covered some parts of the wall. This is the area you want to start with, following the procedure described before with the primer and two coats. Next, apply your chosen paint to the elements; be wary of visible brush strokes.
After this step, you’re done with your DIY painting project; quite easy, right?
Conclusion
Successfully painting your home’s exterior is a project you can easily achieve as a DIY. All you require is an appropriate guide which this article provides. Thus, consider implementing the guide herein for your next exterior painting job for a better-looking home exterior.


