With the number of disabled people rising in every age group, the demand for accessible showers is going exponential. People are looking for safe bathrooms that allow them to bathe peacefully, irrespective of whether they have a disability.
Building these bathrooms is more challenging than many people imagine, though. Bathrooms present a unique set of risks, and it isn’t always clear how to overcome them.
Fortunately, this post can help. We explore “bathrooms without boundaries,” looking at how you can turn your regular shower room into somewhere that’s accessible for all.
1. Zero-Threshold Entry
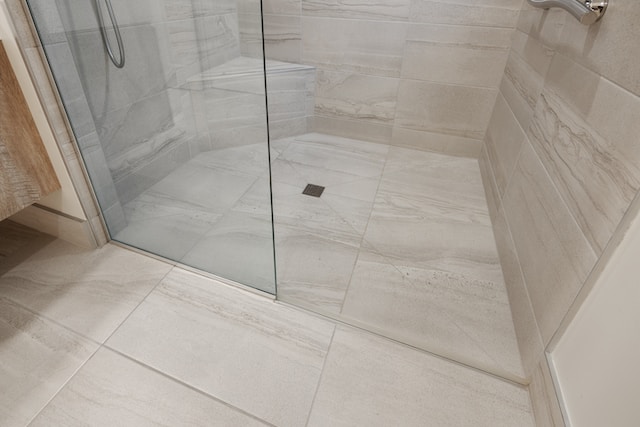
First, you’ll want to opt for zero-threshold entry. These reduce tripping hazards, according to care.com, and make it easier to wheel walking assistance devices and wheelchairs into the room.
The good news is that most bathrooms already have threshold-free access, but some don’t. Check the area under the door and look for evidence of a door surround. Ideally, it should be flush with the flooring in the corridor outside, but if it isn’t you may need to invite workers to remove it and secure the surrounding structure. Never remove a threshold yourself because it might be structural or necessary for securing the entire door frame in place.
2. Add A Waterproof Bench
Adding a waterproof bench is another excellent way to remove boundaries in your bathroom. This piece of furniture provides a convenient place to sit inside or outside of the shower.
Waterproof benches come in various shapes and sizes, depending on your needs. These are excellent options for people who struggle to stand in the shower or for whom it is unsafe to do so.
Double check the bench is waterproof and easy to clean. Stools and other materials shouldn’t be able to penetrate the plastic (or other waterproof material, like silicone).
Also Read: 34 Shower Tile Ideas and Designs.
3. Improve Door Swing Direction
Another option is to change the door swing direction on the shower to prevent any movement impediments in case of an emergency.
Ideally, the door should swing outwards, away from the shower. The user should be able to push on it from the inside and exit as rapidly as possible.
Try to avoid shower mechanisms that use two or more panels to retract. These designs can easily get stuck, preventing someone who needs to leave the shower from doing so.
4. Add Waterproof Handheld Communication To The Walls
You might also want to add handheld communication facilities to the walls, both inside and outside of the shower. Having buttons or short-wave communication devices nearby is helpful if the shower user gets into trouble.
The simplest option is an assistance button or toggle in an accessible position. This alerts a device operated by a caregiver, telling them that the bathroom user is in trouble and requires help. It is also useful if someone gets stuck or needs to turn off the water, but can’t.
5. Accessible Shelving
As sites like https://www.newbathtech.com/ showcase, you might also want to try installing accessible shelving. The idea here is to place items at suitable heights for the disabled person, allowing them to access the things they need, without the need to stand on tip-toes, bend over, or exit the wheelchair.
As you might expect, the most accessible shelving is hip-height. Bathroom users shouldn’t have to stretch or reach into the air to get the items they need.
Also Read: Multiple Health Benefits Of Using A Steam Shower.
6. Adequate Lighting
It also goes without saying that an accessible shower room also requires adequate lighting. Insufficient illumination increases the risk of slips, trips, and falls.
When designing light in the bathroom, aim to create a range of light sources to reduce the risk of shadows forming. You might also want to install a motion sensor that automatically turns the lights on when a person enters, reducing the need for pull-cords, switches, and other inconveniences.
7. Easy-To-Reach Shower Controls
Another option for accessible bathrooms is easy-to-reach shower controls. Placing these at the right height and distance from users facilitates greater independence and may allow them to do most of the work on their own.
Importantly, users shouldn’t feel like they are straining when they reach for controls in the bathroom. Buttons, knobs, and dials should be right in front of them, within hand reach.
8. Grab Bars
You’ll also want to include grab bars in your bathroom. These helpful assistive devices make it easier to get in and out of the bath for people living with limited mobility.
Textured grab bars are even better. These have a bumpy, uneven surface, making them easier to grip onto for transfers in and out of the shower.
Just make sure you screw bar fittings deep into the wall. Don’t attach them to drywall as this can easily pull away, putting the bathroom user at risk of injury.
9. Clean Shower Space
Clean shower space is another feature of accessible bathrooms. Keeping the area clutter-free ensures ease of movement for people with mobility aids and reduces the risk of falling.
Don’t let any grime or soap residue build up on the shower’s floor as it can increase the risk of slipping. Ideally, choose a specialist high-grip wetroom flooring solution to prevent trips or falls, even when surfaces become damp. Falls are the biggest risk in the bathroom for those living with disabilities.
10. Lever Handles
You should also consider installing lever handles in your bathroom. These handy fittings are easier to grip than standard faucets and don’t require as much manual dexterity to open and close.
Long handles are particularly helpful for anyone with muscle wasting or weakness. The extra length increases the moment force available to open the faucet, allowing most users to turn taps on and off, and prevent leaking.
Check out our article on ‘How To Increase Water Pressure In Shower Like An Expert‘.
11. Temperature Adjustment
Another option to make your bathroom more accessible is to install proper temperature control. Some off-the-shelf shower units can get too hot for users, causing discomfort and even scalding. Therefore, you’ll need to modify or replace your existing units with something friendlier.
Fortunately, you can now modify standard shower units to prevent them from emitting water that’s too hot. However, you may need a professional to carry out this work reliably for a safe showering experience.
12. Non-Slip Mats
If ripping up the entire floor is out of the question, you can also experiment with putting down non-slip mats. Placing these in areas likely to get wet reduces the risk of a fall and helps with mobility.
Just make sure you properly attach mats to the floor when positioning them. They can become hazards in themselves if they don’t stick properly.
13. Wide Shower Entrance
You’ll also want to install a wide entrance to your shower unit. Again, this modification helps with mobility device accessibility.
The best option here is to turn the shower into a wetroom without any thresholds or trip hazards. The shower area should have an outward-opening gate, enabling wheelchair access with easy-reach knobs and dials.
The next-best option is a regular shower cubicle with a double-width door and no threshold. Some manufacturers make units with side-opening doors or electronic mechanisms when convenient.
14. Adjustable Showerheads
Another excellent option for accessible showers is adjustable showerheads. These allow users to direct water in the optimal direction if they cannot move about freely.
Handheld showerheads may be an even better option. Users can direct the flow of water to where it is needed most, or away from them if the jet is too strong, hot, or cold.
Conclusion
So, there you have it: all the ways to make your bathroom more accessible to users with disabilities. Even though these design trends might seem specific to disabilities, many are excellent additions to conventional bathrooms to make them safer and more convenient.


