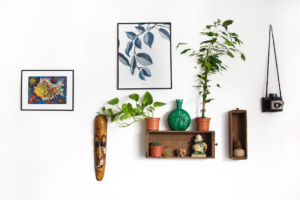
Is your home looking a bit drab? We’ve been there. No matter what you try to do, it never feels truly yours. It feels generic.
Why not add some DIY decorations so you can truly customize your space? You can have one-of-a-kind pieces adorning your home, and they’re a lot of fun to make. It’s time to gather some craft supplies and get to work!
Read on to learn about our favorite easy DIY home decor items you can make this week.
Easy Decorative Epoxy Coasters
Epoxy is a hot item in the craft world right now, and for good reason. It’s a lot of fun to play with and the crafting opportunities are nearly endless. It’s also fairly beginner-friendly as long as you’re willing to put up with some messiness.
One of the simplest crafts you can make with epoxy is a simple coaster. It’s clear that epoxy which is used for river tables (among other things) is great for adding a protective layer. That protective layer is perfect for making something water-resistant which is exactly what you want from a good coaster.
There are two ways to go about this. The first uses molds while the second uses jar lids. They produce very different results, but both are fun and easy. You’ll need:
- Jar lids or round and shallow silicone molds
- Epoxy resin
- Various items to insert in the coasters
So what should go into the coasters? If you’re using the molds, think of small craft items like pom-poms, glitter, confetti, and other small objects that can fit into the shallow molds.
For the jar lid, you want flat items like old holiday cards, photos, or artwork. Holiday cards are great for making holiday-themed coasters!
You’ll start both types of coasters by pouring an incredibly thin layer of epoxy into the mold or lid. Lay your decor objects on top after it has a few minutes to set. Then, pour more epoxy until it fills the mold or lid. Make sure there’s nothing poking out over the top of the epoxy.
Let the epoxy set. The jar lid coasters are finished as-is and the mold coasters simply need to be popped out.
Upcycle Thrifted Frames and Mirrors
This one is super easy, but there’s also room for creativity and more interesting craftwork if you want a bigger challenge.
Go to your local thrift store and head to the wall art section. You should find dozens (if not hundreds) of framed pieces and mirrors there, as well as a few plain frames. Ignore the artwork for the time being and focus on the frames around it.
Pick a few frames that interest you and get ready to upcycle them! You’ll need:d
- Frames and/or mirrors
- Paint
- Paint brushes
- Glue
- Craft supplies (fake flowers, pom poms, glitter, clay, etc)
Now it’s time to get creative. How can you truly make these frames your own? Start using your craft supplies to turn those boring old frames into something you’d love to hang on your wall.
Here’s a quick bonus tip: try to think of the frames as the artwork. You can simply hang the frames rather than putting them around photos or art pieces. This is a fun and quirky way to add some decor to your home.
Pressed Leaves and Plants Frames
Speaking of frames, we have an idea of what you can do with more simplistic frames. Make your own trendy DIY nature decor items.
Do you have a beautiful garden you’d like to preserve? Have you recently been gifted a bouquet you’re not ready to let go of? Perhaps there are some fantastic wild plants in your area that you want to keep forever.
This is a great solution that will add some fun and natural flair to your home.
You’ll need:
- Plants and leaves
- Heavy books
- Parchment paper or newspaper
- Matching frames
- Poster board or matting board
- Glue
You’ll start by pressing the flowers or leaves with your books and parchment paper or newspaper. You can use this guide to get started. Pressing flowers is easy and a lot of fun.
Once you have your pressed flowers and leaves, you’re going to glue each one to the center of a piece of poster board. You can arrange several together in designs if you like, but individual ones look trendy and minimalist.
Frame each plant with a simple frame and hang them all up together for an awesome DIY botanical piece.
Simple Vertical Garden
Speaking of plants, have you ever made a vertical garden? You don’t have to have a green thumb or a lot of space for a garden. These vertical gardens can go outdoors or indoors and they’re great for smaller plants like herbs or succulents. Where will you put yours?
You’ll need:
- A clean pallet
- Wide and thin metal pieces
- Screws and a drill
- Plant pots
- Plants and soil
Lean your palette against something so it’s almost completely vertical but still able to stand up on its own. This is going to be the angle that you’re working with. Bend your thin metal pieces until they’re each in a semi-circle shape. You’re going to drill them into the pallet. Alternatively, you can use super glue.
Pick plant pots that fit the shapes of the metal semi-circles. You can mold each piece around a pot to make this easier if you already have pots at home.
Fill each plant pot with soil and a small plant and put them into the rings. Place your new vertical garden somewhere it can get plenty of sun access.
We love this craft in sunny kitchens because it’s perfect for a small but robust herb garden. Where would you put it?
DIY All of Your Home Decor
So which of these fun DIY home decor projects will you try? They’re all beginner-friendly and a lot of fun. You can totally customize your home with just a few craft supplies, so what’s stopping you?
If you love all things home improvement, don’t forget to check out the rest of the site! You can truly make your house feel like a home.


